AWOP Hover Effect Code...

0 comments

Hover Effect !!!!!!!!!!!!!!
its make ur text or image very impressive..
So Today We will know how to do this using CSS ( Cascading Style Sheet )
1. CSS CODE
<style type="text/css">
a:visited  {color:COLOR; text-decoration: none;}
a:link  {color:COLOR; text-decoration: none;}
a:active  {color: COLOR; text-decoration: underline;}
a:hover   {cursor: crosshair; color: BLUE; text-decoration: underline;}
</style>

DEMO OF ABOVE CODE
GO MOUSE POINTER ON WOP N SEE EFFECT


How To Add Floating Share Count button

1 comments

Adding Floating Social Media share Count Button in BLOGGER
it's latest craze to get share your post. do u ever notice that most of blogs using this floating share count button in blogger. Here included Facebook share, Twitter, Linked In, Digg This and Google +1(plus one) button in floating bar.

See the Demo


Step 1: Login To Blogger Account\

Step 2: Go to Design>>Page Elements

Step 3: Add Gadget>> HTML/JavaScript and paste below code..
<!-- floating page sharers Start -->
<style>
#pageshare {position:fixed; bottom:15%; margin-left:-71px; float:left; border-radius:5px;-moz-border-radius:5px;-webkit-border-radius:5px;background-color:#fff;padding:0 0 2px 0;z-index:10;}
#pageshare .Wopbutton {float:left;clear:both;margin:5px 5px 0 5px;}
.fb_share_count_top {width:48px !important;}
.fb_share_count_top, .fb_share_count_inner {-moz-border-radius:3px;-webkit-border-radius:3px;}
.FBConnectButton_Small, .FBConnectButton_RTL_Small {width:49px !important; -moz-border-radius:3px;/*bs-fsmsb*/-webkit-border-radius:3px;}
.FBConnectButton_Small .FBConnectButton_Text {padding:2px 2px 3px !important;-moz-border-radius:3px;-webkit-border-radius:3px;font-size:8px;}
</style>
<div id='pageshare' title="Get this from cutehearthacker.blogspot.in">
<div class='wopbutton' id='fb'>
<a name="fb_share" type="box_count" href="http://www.facebook.com/sharer.php">Share</a><script src="http://static.ak.fbcdn.net/connect.php/js/FB.Share" type="text/javascript"></script>
</div>
<div class='wopbutton' id='rt'>
<script src="http://tweetmeme.com/i/scripts/button.js" type='text/javascript'></script>
</div>
<div class='wopbutton' id='digg' style='margin-left:3px;width:48px'>
<script src='http://widgets.digg.com/buttons.js' type='text/javascript'></script>
<a class="DiggThisButton DiggMedium"></a>
</div>
<div class='wopbutton' id='gplusone'>
<script type="text/javascript" src="http://apis.google.com/js/plusone.js"></script>
<g:plusone size="tall"></g:plusone>
</a></div>
<div style="clear: both;font-size: 9px;text-align:center;"><a href="http://cutehearthacker.blogspot.com/2011/08/how-to-add-floating-share-count-button.html">Get this</a></div>
</div>
<!-- floating page sharers End -->

How To add Linkedin Share Count Button

2 comments


How to add this linked share button in blogger

Step 1: Login To Blogger Account\

Step 2: Go to Design>> Edit HTML
            Check Expand Widget Templates

Step 3: Then Find Following Coding in your template

               <data:post.body/>

Step 4: Then Paste coding provided below just above that line you recently find.
   
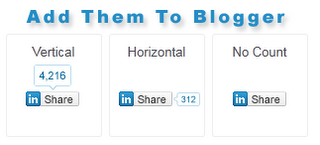
Select which type of linked share button add in your blogger.


For Horizontal linkedin share button

<script src="http://platform.linkedin.com/in.js" type="text/javascript"></script> <script type="IN/Share" data-counter="right"></script>


For No Count linkedin share button

<script src="http://platform.linkedin.com/in.js" type="text/javascript"></script> <script type="IN/Share"></script>


For Vertical linkedin share button

<script src="http://platform.linkedin.com/in.js" type="text/javascript"></script> <script type="IN/Share" data-counter="top"></script>

How To Change Text Area Style in Blogger

1 comments

Hey, Blogger User
Are You Boring With old text area???
Now, decorate Text Area with new style using CSS (Cascading Style Sheet)
DEMO FOR TEXTAREA
A World Of Possibilities
My Self Mayur Sojitra known as Heart Hacker. The founder of A World Of Possibilities (WOP). I'm a freelance writer on topics related to Website Optimization (SEO), blogger customizations, making money online, Hacking Tricks, Computer, Facebook, Twitter Tricks, Tips and Tutorial. I'm blogging since 2009 and I'm currently a guest blogger on Blogging With Success.

Follow me on TWITTER

Find Us On FACEBOOK

Join Us On ORKUT


 Thanx For Visit..
Let's Start Tutorial


Step 1: Login To Blogger Account..

Step 2: Go To Design>Edit Html

Step 3: Press Ctrl + F to find this Content </style>
            And then Download this CSS Code and put this Before </style>

CSS


Step 4: You Can use like this in your blogger post
             <div class='wop'>your text here</div>

Note: your text here in this content u can edit your text..

How to Add facebook like button in blogger

0 comments
From lots of request of new bloggers, We are posting new tricks to show Facebook like button for your blog, You can add Facebook like button in your blogger post.You can also install Google +1 button in blogger,and Add Floating Social media sharing buttons in your blog without any coding.You can also add Twitter (Retweet) button in Blogger blog.
However you can  also use Facebook like button, LinkedIn button, Google plus button, twitter button , Digg bookmarking button to boost your traffic.

Thus You blog post will be shared by other people online on internet and they will click like button on your blog, so your blog post link will be posted on their face book wall post and you will get some extra visitor on your blog.
You can get your code for Adding face book like button in blogger at the following URL:
http://www.facebook.com/facebook-widgets/share.php

Add Google +1(Plus one) Button in blogger

2 comments
Google has recently released Google Plus one button, Some people says it Google +1 button, It is almost working like Facebook like button,Both of them are working same as friends are recommending them,  The main difference between Google +1 button and Facebook like button  ,Digg button ,twitter button , LinkedIn button can only below or above post wherever you put it, and Google +1 button is showing in Google Search Result page in Google Search below Result of your blog or website.
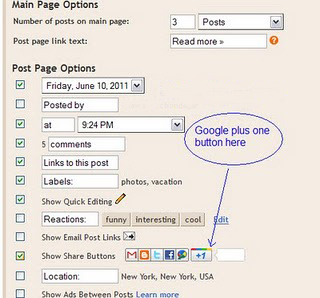
You can show Google Plus one button below each post by going to

Blogger dashboard > Design > Page elements >here select the edit button under blog post element,
You will be redirected to a page in a new windows, here tick mark the show share button and and save , now refresh your blog post and you will see the change without any coding.

 However if you do not like to put the sharing button below post and you wish to add a floating Google plus one button in your blogger post, you can also add it simply by adding Javascript in to your blogger blog.

GO to your Blogger Dashboard > Design > Edit HTML and backup your blogger template first so that if you do not like the change, you can revert it back by uploading previously back up template.
Search for the following code by pressing CTRL + F.

<data:post.body/> 


Now if you wish to add Google +1 button before starting your content and below post tittle , you can put the following coding before the code, and if you wish to show it below your posted content, you can paste the following coding after that code.

<!-- Google +1 button Start -->
<b:if cond='data:blog.pageType != &quot;static_page&quot;'>
<p></p>
<div style='float:left;padding:10px;'>
<script type="text/javascript" src="http://apis.google.com/js/plusone.js"></script>
<g:plusone expr:href="data:post.url" size="standard" count="true"></g:plusone>
</div>
</b:if>
<!-- Google +1 button End -->
Now Just save the template, You may customize your Google plus 1 button size by following attributes.
small
medium
tall
standard
Here we have given the size standard, you can find it in coding by pressing ctrl + F and search for size="standard"

If you do not wish to appear the count in Google +1 button, you may change the attribute true or false in count attributes.

How To Change the Icon of Removable Drives

0 comments
How to change icon of Removable Drives..????
Is this Possible ??
I m Saying YES Why not... B'coz This is A World Of Possibilities
Let's Start by making autorun..

Step 1: First of all Make icon for your Removable Drive
                   Image Extention must be .ico

Step 2: Now, Put that icon image in Removable Drive.

Step 3: Now, Open Notepad and Past this Code

[autorun]
lable=Removable Drive Name
icon=icon image name

Step 4:Save it is name as Autorun.inf in Removable Drive

Now You have Done It....


How To Unlock HSDPA Huawei USB All Models Modem For Free

1 comments
How To Unlock HSDPA Huawei USB Modem For Free / All Models Modem Unlocker HWCALC V2.0

Hey! u know how to unlock huawei modems free..this post tell you how to unlock huawei modems free over the internet. so very easy'you want a only 15-Digits IMEI number your huawei modem'and i'm give you video tutorial for this post.but it; is very easy.i hope you really like this post..Thank you.

Step 1.You first copy and past below code to your browser search bar.

http://bb5.at/huawei.php?imei=15-Digits IMEI Your Huawei Modem

Note: Replace: 15-Digits IMEI Your Huawei Modem with your Huawei Modem IMEI Code.

Look at the example below:

http://bb5.at/huawei.php?imei=357963013357194

Step 2.Now Press Enter Key

Step 3.Now Your Done


Create Pure CSS 3D Ribbon

0 comments
Since I always insists using CSS3 instead of images, here is a good example of CSS usage to create a 3D ribbon. Remember this is pure CSS, there is no image used in this to achieve it. I thank James Koster for making this happen and I hope to see even more CSS tuts from him. So lets have a look at his CSS 3D ribbon and how to create it.

James has used a single level element containing a child element with the class.

<p class="ribbon">
   
<strong class="ribbon-content">Everybody loves ribbons</strong>
</p>

 In order to achieve it using CSS, he has used before and after pseudo codes and good use of border properties

.ribbon {
font-size: 16px !important;
/* This ribbon is based on a 16px font side and a 24px vertical rhythm. I've used em's to position each element for scalability. If you want to use a different font size you may have to play with the position of the ribbon elements */

position: relative;
background: #ba89b6;
color: #fff;
text-align: center;
padding: 1em 2em; /* Adjust to suit */
margin: 0 0 3em; /* Based on 24px vertical rhythm. 48px bottom margin - normally 24 but the ribbon 'graphics' take up 24px themselves so we double it. */
}
.ribbon:before, .ribbon:after {
content: "";
position: absolute;
display: block;
bottom: -1em;
border: 1.5em solid #986794;
z-index: -1;
}
.ribbon:before {
left: -2em;
border-right-width: 1.5em;
border-left-color: transparent;
}
.ribbon:after {
right: -2em;
border-left-width: 1.5em;
border-right-color: transparent;
}
.ribbon .ribbon-content:before, .ribbon .ribbon-content:after {
content: "";
position: absolute;
display: block;
border-style: solid;
border-color: #804f7c transparent transparent transparent;
bottom: -1em;
}
.ribbon .ribbon-content:before {
left: 0;
border-width: 1em 0 0 1em;
}
.ribbon .ribbon-content:after {
right: 0;
border-width: 1em 1em 0 0;
}


If your using the ribbon inside another element, add this CSS

position: relative;
z-index: 1;

Shortcut key of FACEBOOK for different browser....

0 comments

Google Chrome Facebook Shortcuts
Alt+1: View your News Feed
Alt+2: View your own Profile
Alt+3: View pop-up of friend requests
Alt+4: View pop-up of messages
Alt+5: View pop-up of notifications
Alt+6: View Account Settings
Alt+7: View Privacy Settings
Alt+8: View Facebook’s own profile
Alt+9: Read latest Terms of Service agreement.
Alt+?: Search Alt+m: Compose a new message If you are using Firefox browser then you also need to press SHIFT along with the above shortcut keys.

Firefox Facebook Shortcuts
Shift+Alt+1: View your News Feed
Shift+Alt+2: View your own Profile
Shift+Alt+3: View pop-up of friend requests
Shift+Alt+4: View pop-up of messages
Shift+Alt+5: View pop-up of notifications
Shift+Alt+6: View Account Settings
Shift+Alt+7: View Privacy Settings
Shift+Alt+8: View Facebook’s own profile
Shift+Alt+9: Read latest Terms of Service agreement
Shift+Alt+0: Open Facebook Help Center
Shift+Alt+?: Search
Shift+Alt+m: Compose a new message If you are using
Internet Explorer then you you can use the Facebook shortcuts of Google chrome,but you have to press ENTER after each shortcut .,

TOP 107 CMD TRICKS...!!!!!!!

0 comments

‎1. Accessibility Controls - access.cpl
2. Accessibility Wizard - accwiz
3. Add Hardware Wizard - hdwwiz.cpl
4. Add/Remove Programs - appwiz.cpl
5. Administrative Tools - control admintools
6. Automatic Updates - wuaucpl.cpl
7. Bluetooth Transfer Wizard - fsquirt
8. Calculator - calc
9. Certificate Manager - certmgr.msc
10. Character Map - charmap
11. Check Disk Utility - chkdsk
12. Clipboard Viewer - clipbrd
13. Command Prompt - cmd
14. Component Services - dcomcnfg
15. Computer Management - compmgmt.msc
16. Control Panel - control
17. Date and Time Properties - timedate.cpl
18. DDE Shares - ddeshare
19. Device Manager - devmgmt.msc
20. Direct X Troubleshooter - dxdiag
21. Disk Cleanup Utility - cleanmgr
22. Disk Defragment - dfrg.msc
23. Disk Management - diskmgmt.msc
24. Disk Partition Manager - diskpart
25. Display Properties - control desktop
26. Display Properties - desk.cpl
27. Dr. Watson System Troubleshooting Utility - drwtsn32
28. Driver Verifier Utility - verifier
29. Event Viewer - eventvwr.msc
30. Files and Settings Transfer Tool - migwiz

31. File Signature Verification Tool - sigverif
32. Findfast - findfast.cpl
33. Firefox - firefox
34. Folders Properties - control folders
35. Fonts - control fonts
36. Fonts Folder - fonts
37. Free Cell Card Game - freecell
38. Game Controllers - joy.cpl
39. Group Policy Editor (for xp professional) - gpedit.msc
40. Hearts Card Game - mshearts
41. Help and Support - helpctr
42. HyperTerminal - hypertrm
43. Iexpress Wizard - iexpress
44. Indexing Service - ciadv.msc
45. Internet Connection Wizard - icwconn1
46. Internet Explorer - iexplore
47. Internet Properties - inetcpl.cpl
48. Keyboard Properties - control keyboard
49. Local Security Settings - secpol.msc
50. Local Users and Groups - lusrmgr.msc
51. Logs You Out Of Windows - logoff
52. Malicious Software Removal Tool - mrt
53. Microsoft Chat - winchat
54. Microsoft Movie Maker - moviemk
55. Microsoft Paint - mspaint
56. Microsoft Syncronization Tool - mobsync
57. Minesweeper Game - winmine
58. Mouse Properties - control mouse
59. Mouse Properties - main.cpl
60. Netmeeting - config

  ‎61. Network Connections - control netconnections
62. Network Connections - ncpa.cpl
63. Network Setup Wizard - netsetup.cpl
64. Notepad - notepad
65. Object Packager - packager
66. ODBC Data Source Administrator - odbccp32.cpl
67. On Screen Keyboard - osk
68. Outlook Express - msimn
69. Paint - pbrush
70. Password Properties - password.cpl
71. Performance Monitor - perfmon.msc
72. Performance Monitor - perfmon
73. Phone and Modem Options - telephon.cpl
74. Phone Dialer - dialer
75. Pinball Game - pinball
76. Power Configuration - powercfg.cpl
77. Printers and Faxes - control printers
78. Printers Folder - printers
79. Regional Settings - intl.cpl
80. Registry Editor - regedit
81. Registry Editor - regedit32
82. Remote Access Phonebook - rasphone
83. Remote Desktop - mstsc
84. Removable Storage - ntmsmgr.msc
85. Removable Storage Operator Requests - ntmsoprq.msc
86. Resultant Set of Policy (for xp professional) - rsop.msc
87. Scanners and Cameras - sticpl.cpl
88. Scheduled Tasks - control schedtasks
89. Security Center - wscui.cpl
90. Services - services.msc

‎91. Shared Folders - fsmgmt.msc
92. Shuts Down Windows - shutdown
93. Sounds and Audio - mmsys.cpl
94. Spider Solitare Card Game - spider
95. SQL Client Configuration - cliconfg
96. System Configuration Editor - sysedit
97. System Configuration Utility - msconfig
98. System Information - msinfo32
99. System Properties - sysdm.cpl
100. Task Manager - taskmgr
101. TCP Tester - tcptest
102. Telnet Client - telnet
103. User Account Management - nusrmgr.cpl
104. Utility Manager - utilman
105. Windows Address Book - wab
106. Windows Address Book Import Utility - wabmig
107. Windows Explorer - explorer
 
0 comments
Don't forget to become a fan!

Dear visitors, Welcome to our Fan Page.Making Different is a blogging resource website. It helps it readers in improving their blogging skills and teach them How to make a blog from scratch. It also focuses on social media,SEO, blog marketing and design. Written by, lover of all things related to Internet, computers, entertainment, technology, web development, programming and anything uptime-related.
Please contact us and we really appreciate with your comment and suggestion. If you have any special stuffs and need to publish at Royal Turot, please send us a unique articles which is not the press release or already submit in others blog. We will publish it soon.
Design by Making Different. All Rights Reserved.

Call any Landline, Mobile Phone anywhere from Gmail using Google Voice

1 comments

Yes,now you can reach the people you care about from right inside Gmail.This service available to many more of you who use Gmail outside the U.S. by offering calling in 38 new languages around the world.Before this service only launched in  US and Canada only.Now Google expands its Google Voice Project to reach more destinations.

How to enable Google Voice in Gmail outside US:

1.To get this service You need to download Voice and Video  Plugin and restart browser after installation.


Google Voice Call Charges:

Google voice rates are really cheap if you are using for calling outside your country. What I liked most is calling rates for US which is just 0.01 USD from anywhere in the world.
There are no connection fees levied by Google, you just pay for what you talk. Google Voice Rates page also compares the call charges with leading Internet Telephony service ( Skype).
Calls to the U.S. or Canada placed within those countries will continue to be free at least for the rest of 2011. Calls to the U.S. or Canada placed from outside these countries will be charged $0.01per minute (or €0.01, £0.01, C$0.01 per minute). .


Credits can be added to your account to make the voice calls using Google voice.

Enable Google Voice in Google Apps:

If you’re a Google Apps user, your domain administrator must have Google Voice and Google Checkout enabled in the administrator control panel in order to be able to use this feature.

Note:At the Time of Writing this post Google not yet open this service to certain countries but will open soon.

How to Get Windows 8 Aero Auto-Colorization Feature in Windows Vista and 7

0 comments

What is Windows 8 Aero Auto-Colorization:

A new feature has been revealed in Windows 8 build. 
Aero Auto-Colorization is the new feature to automatically configure the color of Aero elements, like the Start Menu, Windows Explorer windows, and the taskbar based on the desktop wallpaper.
Now, as you rotate through different wallpapers, the window color will change to match the wallpaper (in Aero mode only).It is the feature introduced in Windows 8 build.

How to Get Windows 8 Aero Auto-Colorization Feature in Windows Vista and 7:

Now you can get the same functionality in Windows Vista and 7 using a freeware "Aura".
Aura is an excellent program developer by Stealth2010 which calculates average color of desktop background image or active window icon and sets it as Aero Glass color. It works like color hot-track in Windows 7 taskbar.

It works in Windows Vista and 7.

Enable the (Hidden) Administrator Account on Windows Vista and Windows 7

0 comments


Many people familiar with prior versions of Windows are curious what happened to the built-in
Administrator account that was always created by default. Does this account still exist, and how can you access it?
The account is created in Windows Vista ,Windows 7, but since it's not enabled you can't use it.
If you are troubleshooting something that needs to run as administrator, you can enable it with a simple command.
Note: You really shouldn't use this account for anything other than troubleshooting. In fact, you probably shouldn't use it at all.

Enable Built-in Administrator Account:

First you'll need to open a command prompt in administrator mode by right-clicking and choosing
"Run as administrator" (or use the Ctrl+Shift+Enter shortcut from the search box)
Now type the following command:
net user administrator /active:yes
You should see a message that the command completed successfully. Log out, and you'll now
see the Administrator account as a choice.You should see a message that the command completed successfully.
Log out, and you'll now see the Administrator account as a choice.You'll note that there's no password for this account,
so if you want to leave it enabled you should change the password.You'll note that there's no password
for this account, so if you want to leave it enabled you should change the password.

Disable Built-in Administrator Account:

Make sure you are logged on as your regular user account, and then open an administrator mode command prompt as above.
Type the following command:
net user administrator /active:no
The administrator account will now be disabled, and shouldn't show up on the login screen anymore.

How To Create Facebook Welcome Page In One Simple Step

0 comments
Creating a Facebook landing/welcome page is no more difficult. Since then FBML was called off by Facebook, iFrame came to the rescue to create custom landing page for Facebook fan page. Normally to create an iFrame tab, you are required to create an app and follow certain instructions. To me, its quite hard for the beginners to catch up with it. For all those users, who look for quick setup of iframe tab, here is Static HTML: iFrame tabs a Facebook app developed to easily add custom html codes to create welcome page or landing page in minutes.

Add Static HTML Facebook app


After installing the app, assign the app to anyone of your Facebook Fan page and click Add. Now you can see welcome tab on your Facebook fan page on which we have to add the respective codes.

Example script (just to try)


<html>
 
<head>
   
<title>My Facebook Welcome Page</title>
 
</head>
 
<body>
   
<h1>Welcome to my Facebook Page</h1>
   
<p>Place a text that has to be displayed for Facebook visitors</p>
 
</body>
</html>

If you have a close look at the app, you can see another box which is for displaying content for
‘fans only”. This option is quite useful if your running a contest for fans, you can make use of this box to enter fans only content on your Facebook fan page.
After saving the sample HTML code or the custom code create for your landing page hit save. Now view the landing page as non-fan visitor to check out the output. Finally edit your Facebook fan page and set the default landing page as welcome or whatever name you used for the Static HTML Facebook app.

Here is the output


How To Add Perfect Share Box to Blogger

0 comments
In this tutorial, I am going to show how to add a useful share box for your blogger blog. This share box contains official Tweet button with counter, official Facebook share button with counter, official Google Buzz button with counter, official Stumbleupon button with counter, BlogThis! link, Email This! link, Print This! link, Comments count link and Facebook like button. I have configure all this button for Blogger blogs, so you can add this share box quickly to your blog.

Now follow the steps given below to add this share box for your blog.

1.Login to your blogger Dashboard and go to --> Design- -> Edit HTML

2.Click on "Expand Widget Templates"

3.Scroll down to where you see below code:

<div class='post-header-line-1'/>

4.Now Copy Share Box code given below and paste it just below the above code.

NOTE: If you can't find <div class='post-header-line-1'/> in your template, paste your "Twitter tweet button" code just before <data:post.body/> .

<b:if cond='data:blog.pageType == &quot;item&quot;'>

<style type='text/css'>
.multisharebox {
background: none repeat scroll 0 0 #EFEFEF;
float: right;
margin: 5px 0px 3px 10px;
padding: 0 5px 0;
text-shadow: 0 1px 0 #FFFFFF;
width: 260px;
border:4px solid #d8dfea;
}
.fb-like-boxtop {
background: none repeat scroll 0 0 #EDEFF4;
border: 1px solid #D8DFEA;
color: #000000;
float: right;
font-size: 11px;
margin: 0 0;
padding: 5px 10px;
text-align: left;
width: 230px;
}
.fb-like-boxtop a {
color: #000000;
text-decoration:none;
}
.fb-like-boxtop a:hover {
color: #000000;
text-decoration:underline;
}
.fb-like-box {
background: none repeat scroll 0 0 #EDEFF4;
border: 1px solid #D8DFEA;
color: #000000;
float: right;
font-size: 11px;
height: 60px;
margin: 5px 0;
overflow: hidden;
padding: 5px 10px;
text-align: left;
width: 230px;
}
</style>

<!-- Perfect Share Box : Created by www.bloggertipandtrick.net -->
<div class='multisharebox'>
<table><tr>
<td><table><tr>
<td><a class='twitter-share-button' data-count='vertical' data-lang='en' data-related='' data-via='' expr:data-text='data:post.title' expr:data-url='data:post.url' href='http://twitter.com/share' rel='nofollow'/>
<b:if cond='data:post.isFirstPost'>
<script src='http://platform.twitter.com/widgets.js' type='text/javascript'>
</script>
</b:if></td>
<td><script expr:src='&quot;http://www.stumbleupon.com/hostedbadge.php?s=5&amp;r=&quot; + data:post.url'/></td>
<td><a class='google-buzz-button' data-button-style='normal-count' data-locale='en_IN' expr:data-url='data:post.url' href='http://www.google.com/buzz/post' rel='nofollow' title='Post on Google Buzz'/>
<script src='http://www.google.com/buzz/api/button.js' type='text/javascript'/></td>
<td><a expr:share_url='data:post.url' name='fb_share' rel='nofollow' type='box_count'/>
<script src='http://static.ak.fbcdn.net/connect.php/js/FB.Share' type='text/javascript'/></td>
</tr></table></td>
</tr><tr>
<td><div class='fb-like-boxtop'><a expr:href='data:post.sharePostUrl + &quot;&amp;target=blog&quot;' expr:onclick='&quot;window.open(this.href, \&quot;_blank\&quot;, \&quot;height=270,width=475\&quot;); return false;&quot;' expr:title='data:top.blogThisMsg' target='_blank'>BlogThis!</a> | <a expr:href='data:post.sharePostUrl + &quot;&amp;target=email&quot;' expr:title='data:top.emailThisMsg' target='_blank'>Email This!</a> | <a href='javascript:window.print();'>Print This!</a> | <b:if cond='data:post.allowComments'><a expr:href='data:post.addCommentUrl' expr:onclick='data:post.addCommentOnclick'><b:if cond='data:post.numComments == 0'>No comments</b:if><b:if cond='data:post.numComments == 1'>1 comment</b:if><b:if cond='data:post.numComments &gt;= 2'><data:post.numComments/> comments</b:if></a></b:if></div></td>
</tr><tr>
<td><div class='fb-like-box'>
Do you like this post?
<iframe allowTransparency='true' expr:src='&quot;http://www.facebook.com/plugins/like.php?href=&quot; + data:post.url + &quot;&amp;layout=standard&amp;show_faces=false&amp;width=230&amp;action=like&amp;font=arial&amp;colorscheme=light&quot;' frameborder='0' scrolling='no' style='border:none; overflow:hidden; width:230px; height:40px;'/>
</div></td>
</tr></table>
</div>
<!-- Perfect Share Box : Created by www.bloggertipandtrick.net -->

</b:if>

Note : This share box now will add to your Blogger post pages only. If you want to show it in every pages, then simply remove green lines from the code.

5. Save your template and you are done.

How To Add Official Twitter Follow Button to Blogger

0 comments
Adding Twitter Follow Button to your website, making it easy for you to discover the Twitter accounts of your favorite reporters, athletes, celebrities, and other personalities. Using the Follow Button is as simple as a single click. You can also see the profile and latest Tweets of the account you want to follow by clicking the username next to the Button.

For publishers and brands, adding the Follow Button to your website and using Twitter to stay connected with your audience is a powerful combination. People who follow your account are much more likely to retweet and engage with your Tweets, and to repeatedly visit your website. Adding the Follow Button to your website is quick and easy.


Follow the steps given below add twitter follow button to your blog posts.

Step 1 : Go to "Edit HTML". Click on "Expand Widget Templates"

Step 2 : Scroll down to where you see below code:

<div class='post-header-line-1'/>

Step 3 : Now Copy below code and paste it just below the above code.

NOTE: If you can't find <div class='post-header-line-1'/> in your template, paste the code just before <data:post.body/> .

<div style='float:right;margin-right:5px;'>
Your Twitter Code Here
</div>
Now replace "Your Twitter Code Here" with the code, taken using below link:


http://twitter.com/about/resources/followbutton

Now save your template and you are done.

How To Add Facebook Comment Box To Blogger Blogs

0 comments
Facebook comment box is one of the useful tool for bloggers to increase conversations. Recently Facebook has launched many social plugins for bloggers and web developers and one such is improved Facebook comment box. So here in this post I will teach you how to add/integrate Facebook comment box to blogger in simple steps. Before getting into the process I recommend you to back up your template and previous comments in blogger wont be visible if you use Facebook commenting system.
Step 1: Visit Facebook developer page and enter your blog name, URL and click on Create application.

Now copy the App ID and save it in a notepad

<b:if cond='data:blog.pageType == &quot;item&quot;'>
 
  <div id='fb-root'/>
  <script>
  window.fbAsyncInit = function() {
  FB.init({appId: &#39;APPID&#39;, status: true, cookie: true,
  xfbml: true});
  };
  (function() {
  var e = document.createElement(&#39;script&#39;); e.async = true;
  e.src = document.location.protocol  +
  &#39;//connect.facebook.net/en_US/all.js&#39;;
  e.async = true;
  document.getElementById(&#39;fb-root&#39;).appendChild(e);
  }());
  </script>
  <fb:comments/>
  </b:if>

Step 2: Login to you Blogger dashboard and navigate to Layout > Edit HTML and check on Expand Widget Templates. Search for the code <data:post.body/> or <div class='post-header-line-1'/> and paste the code below <data:post.body/> or <div class='post-header-line-1'/> and save the template.
<b:if cond='data:blog.pageType == &quot;item&quot;'>
  <p align='left'><img alt='' class='icon-action' src='https://blogger.googleusercontent.com/img/b/R29vZ2xl/AVvXsEi91rB8DSG_NKGkma7baNVyP4IKaHBVq_YBLntxRcMsgGhpebDxjNIWd-GIGg3S3tHio1AjNVNAWu7y4wGy8ubn7ijPs66GxqDGEwXDjw3vi-cUHFcE90j22BsPmi0a5MkZXVvKAB7ULuhX/s1600/cmds.png></p>
  <div id='fb-root'/>
  <script>
  window.fbAsyncInit = function() {
  FB.init({appId: &#39;APPID&#39;, status: true, cookie: true,
  xfbml: true});
  };
  (function() {
  var e = document.createElement(&#39;script&#39;); e.async = true;
  e.src = document.location.protocol  +
  &#39;//connect.facebook.net/en_US/all.js&#39;;
  e.async = true;
  document.getElementById(&#39;fb-root&#39;).appendChild(e);
  }());
  </script>
  <fb:comments/>
  </b:if>

Change the APPID on the code with your APP ID provided from Facebook and save the template.

Step 3: Now you need to hide default blogger commenting system. So navigate to Settings > Comments and select hide and save settings.

Note: Using Facebook Comments will hide your blogger comments. So use this comment box wisely

20 tricks n tips for fast pc

0 comments


1. Wallpapers: They slow your whole system down, so if you're willing to compromise, have a basic plain one instead!


2. Drivers: Update your hardware drivers as frequently as possible.  New drivers tend to increase system speed especially in the case of graphics cards, their drivers are updated by the manufacturer very frequently!


3. Minimizing: If you want to use several programs at the same time then minimize those you are not using.  This helps reduce the overload on RAM.

4. Boot Faster: The 'starting Windows 95/98' message on startup can delay your booting for a couple of seconds.  To get rid of this message go to c:\ and find the file Msdos.sys.  Remove the Read-Only option.  Next, open it in Notepad or any other text editor.  Finally, go to the text 'Options' within the file and make the following changes: Add BootDelay=0.  To make your booting even faster, set add Logo=0 to remove the Windows logo at startup.


5. Restart only Windows: When restarting your PC, hold down Shift to only restart Windows rather than the whole system which will only take a fraction of the time.


6. Turn Off Animations:  Go to Display Settings from the Control Panel and switch to the Effects Tab. Now turn off Show Windows Content While Dragging and Smooth Edges on Screen Fonts.  This tip is also helpful with Windows XP because of the various fade/scroll effects.


7. Faster Start-Menu Access: Go to the Start menu and select Run.  Now type Regedit and hit Enter.  The Registry Editor will appear on the screen.  Now, open the folder HKEY_CURRENT_USER\Control Panel\Desktop.  You should see a MenuShowDelay value.  If you don't then do the following: right click on a blank space in the right pane and select New\String.  Change the name in the new value to MenuShowDelay.  Now that we have the MenuShowDelay value, double click on it and enter 0 in the value data field.  This sets the start menu delay to 0 milliseconds.


8. Resolutions: If you are willing to do anything for faster performance from your PC, then try lowering your display resolution.  The lower it is, the faster your PC.

9. Turn off Active Desktop:  Go to your Display Properties and switch to the Web tab.  Uncheck View My Active Desktop As a Web Page.  Since the Active Desktop option under Windows 98 uses a lot of system resources, this option can have a dramatic effect on the speed of the whole system.


10. Defragment Often:  Windows 98's Defrag tool uses Application Acceleration from Intel which means that when you defragment your drive, data is physically arranged on the drive so that applications will load faster.

11. Take your PC to Bed:  Using the Advanced Power Management feature under Windows 98 gives you the option to use the sleep command.  That way, you can send your PC to sleep instead of shutting it down and then restarting it.  It's as simple as pressing a button and then pressing the same button to wake it up.  You can tell Windows after how many minutes/hours of inactivity to automatically sleep the machine in the Advanced Power Management section of the Control Panel.


12. Faster Internet Access: If you use the internet for reference and the sites you visit are rarely  updated then try the following.  In IE (the same can be done in Netscape) go to Tools, Internet Options.  Next, click on Settings... in the Temporary Internet Files  section.  Finally, select Never for the first option and double the amount of storage space to use, click OK!


13. Benchmarking: Benchmarking can be very useful when run frequently.  It can tell you how your PC's components are performing and then compare them to other machines like yours.  For example, when you overclock your PC, you want to know how much more speed you have and whether it is stable.  All this and more can be discovered using benchmarking.  An excellent piece of software for doing this job is SiSoft Sandra which can be found in the Downloads File Archive!


14. Refresh the Taskbar without restarting: If you in some way change the taskbar, either in Regedit or elsewhere, you can refresh the task bar without restarting.  Hold down Ctrl Alt Del, and double click on Explorer.  Say Yes to close Explorer, but no to closing Windows.  This will refresh the Taskbar and system tray.


15. Quick CD Eject: Instead of pushing the button on your drive, right-click your CD drive letter in My Computer and click on Eject.  This will also remove any icons that have become associated with the CD drive.


16. Start Up Programs:  Windows can be slowed down when programs run on start up.  To eliminate this, check your Start up folder.  You can access it from the start menu: Start, Programs, Start Up.  Another way to eliminate programs from loading even before Windows actually starts is by doing the following: Click on Start, then Run.  Type msconfig.  It will take quite a long time for this program to load, but when you finally see it on your screen, explore the different tabs.  They all have to do with how quickly your PC boots, so select what you want, and uncheck what you don't want!


17. Fonts: When Windows starts, it loads every single font in the Fonts folder.  Therefore, the more fonts you have, the slower the booting process.  To get rid of unwanted fonts, simply go to the Fonts folder under c:\windows and remove whatever you don't want.  Fonts that have a red letter 'A' as their icon are system fonts, so don't delete them.


18. Stretching Wallpapers:  Don't "stretch" your wallpaper in Windows 98 since it actually slows Windows down when you drag icons around on the desktop.


19. RAM Matters: If you have less than 32MB then you should seriously think of upgrading it to at least 64MB.  Windows runs much more smoothly with 64MB or higher and tends to use less hard disk space for virtual memory.


20. Partitioning: A very nice little thing you can do to boost system performance.  By partitioning your hard drive, splitting one physical drive into several logical ones, you can gain several advantages.  1. If you get a virus or you accidentally format a drive, not all will be lost.  2. By placing the swap file (Win386.swp) on a separate drive, The swap file will be less fragmented and thus, faster. 3. Place Windows on a separate drive and whenever you need to reinstall it, you rest assured that your data is safe on a separate drive.  Partitioning can be done using a few programs such as FDisk which comes with DOS.  However, FDisk formats everything on the hard disk before partitioning. Alternatively, you can use Partition Magic from Power Quest to partition your hard disk without losing your data.
 

Google+ Followers

Total Pageviews

FeedBurner

Mayur Sojitra - Find me on Bloggers.com
Follow on Bloglovin
© 2012 A World Of Possibilities . Designed by Nitin Maheta, Powered by Blogger