Blogger pageview statistics hiccup

1 comments

Today's Morning, My blogger stats pageviews reverted to zero(0)

Blogger pageview statistics hiccup
Google
We've received many reports about missing pageview counts on Blogger stats, and we're working to resolve this problem as quickly as possible. Thanks for bearing with us -- we apologize for the inconvenience this issue has caused

Google's product forums for Blogger are filled with similar reports from users complaining that their statistics have been completely reset..

Create PDF File in 2 simple and easy method

0 comments

Why Use PDF??
  • PDF is the official open standard ISO 32000. Being supported by International Organization for Standardization (ISO), the ISO 32000 standard will continue to be developed in the future with the purpose of protecting integrity and longevity of the PDF format – an open standard for more than 1 billion PDF files existing today.
  • PDF files look like source documents and save the data of source documents: text, pictures, video, 3D-graphics, maps, true-color images, photos and even business-charts, regardless of an application they were created in.
  • PDF files can be viewed and printed on virtually any platform: Windows, Mac, Unix, Symbian, Windows Mobile and many others.
  • Today, over 250 millions of PDF documents in Internet and countless PDF files in government departments and companies all over the world show how many organizations entrust their information to the PDF format.
  • PDF documents support auxiliary technologies ensuring the availability of information to disabled people.
  • A full-text search capability.
  • A password protection capability.

 Download PDF Creator
PDF creator is a freeware and is available at http://pdfcreator.en.softonic.com/download. You can install this software to convert your existing text or word documents into PDF.
Installation steps are quite simple. When you click on ‘Free Download’ it asks whether you want to save or run the application. You can select any of them. It then asks if you accept the agreement and start installation process .Setup has been installed, you are now supposed to run it.
Right click on the document you want to convert.
Select Create PDF and Bitmap Files with PDF Creator.
A dialog box appears informing it is necessary to set PDF creator as default printer. It is a temporary printer so no issues with it. You can easily continue.
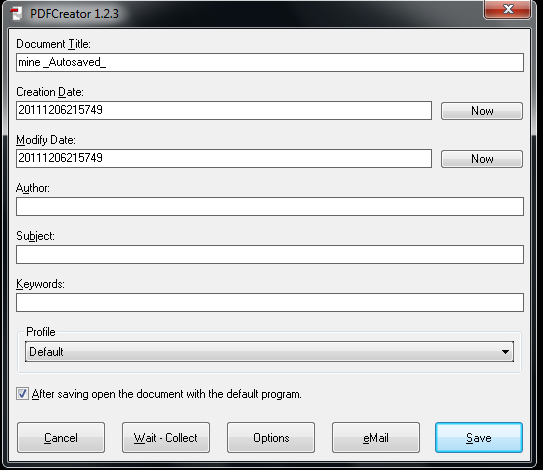
Following dialog box appears. Click Save and specify save location.


Document is now converted into PDF format. (I have converted a ’docx’ format into ‘pdf’).Even the highlighting is preserved.


Create PDF Online


If you are not interested in downloading and installing softwares … we have found a way out. You can create your pdf documents online at https://www.acrobat.com/createpdf/en/home.html

  • Click  convert PDF now.
  • It will present you its packages.
  • Subscribe to any of them.
  • It will then ask your particulars.
  • Once you are done with the sign up process, you can use it anytime. Since the prices are high, very few will go for this option so let’s move to the simplest one.

How to add "Add me on Google +" widget for blogger

0 comments
Facebook, Twitter, flicker, orkut etc are using for social networking but now a days Google developed Google + in social network.
If you already have Google+ Plus account, and if you're kind of wondering How to Make "Add Me on Google+ Plus" Widget "Add to Circles" in Blogger Google. Well, then this post will show you how to do that. Anyway, as you've known that by putting the widget allows you to show the visitors of your blog or website that you have a Google+ account. Therefore its a great opportunity to get in touch with your visitors and to increasing your friends to add you in circles.
How to add "Add me on Google +" widget for blogger

Well, here's how to add "Add Me on Google+ Plus" widget on Blogger Sidebar:

  • Firstly, you need to visit your Google Plus profile page. Then take a look at the URL in your browser address bar. It looks like this:
    https://plus.google.com/106124274181440071950/posts
  • The red marked is Google+ ID, now you should copy this!


  • Then you paste the Google+ ID you've copied, looks like this. In this part you can customization.

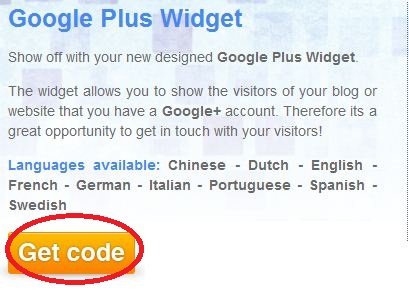
  • After that you click the orange "Get Code" button, and copy that HTML code.
  • Now, you login to Blogger > go to Design > Page Elements and click an "Add A Gadget", then Select HTML/Javascript.

  • Just paste the code you've copied to the HTML box and save it. Enjoy!

Then The widget looks like something this!!!!

How To Add Google Buzz Share Count Button

0 comments
Google Buzz is a great social tool which is very similiar to Twitter and Facebook. Google Buzz is one part of google. It's a wonderful way to engage and interact with your readers! Make sure to implement these Google Buzz buttons into your blogger posts, so that users can easily share your content on Google Buzz.


Add Google Buzz Share Button
  • Go to Layout >Edit HTML in your Blogger Dashboard.
  • Back up your existing Template before making any changes!
  • Make sure to check the "Expand Widget Templates" box.
  • Here is the Google Buzz it With Share Count Code:

<div style="float:right;padding:4px;"> <script type='text/javascript'> njuice_buzz_url = '<data:post.title/>'; njuice_buzz_title = '<data:post.url/>'; njuice_buzz_share = 'reader'; </script> <script type='text/javascript' src='http://button.njuice.com/buzz.js'/> </div>

  • Place the Google Buzz it with Share Count Code either directly after this:
<div class='post-header-line-1'/>
OR
Directly before this:
<data:post.body/>

  • Now save your template and you're done!

How To Add Google Buzz Share Button

0 comments
Google Buzz is a great social tool which is very similiar to Twitter and Facebook. Google Buzz is one part of google. It's a wonderful way to engage and interact with your readers! Make sure to implement these Google Buzz buttons into your blogger posts, so that users can easily share your content on Google Buzz.


Add Google Buzz Share Button
  • Go to Layout >Edit HTML in your Blogger Dashboard.
  • Back up your existing Template before making any changes!
  • Make sure to check the "Expand Widget Templates" box.
  • Here is the Google Buzz it Code:
<div style="float:right;padding:4px;">
<a expr:href='&quot;http://www.google.com/reader/link?url=&quot; + data:post.url + &quot;&amp;title=&quot; + data:post.title + &quot;&amp;srcTitle=&quot; + data:blog.title+ &quot;&amp;srcURL=&quot; + data:blog.homepageUrl ' rel='nofolloW' style='text-decoration:none;' target='_blank'>
<img alt='Buzz It' src='http://i48.tinypic.com/idyc04.png' style='border:0px;'/></a>
</div>
  • Search for this line of code in your template:
<div class='post-header-line-1'/>

  • and place the Google Buzz it Code right after the code you searched for above.
    If this doesn't work, then search for this code below and place the Google Buzz it Code directly before it.
<data:post.body/>

  • Now save your template and you're done!

You Should Avoid 3 Blogging Mistakes

0 comments

One thing I have learned about blogging is that the best way to achieve success faster is by learning from those who have been there and as a result I will be showing you 3 of the top blogging mistakes I have made and why you should avoid them.
  • Not Having Your Own Domain Name and Professional Hosting

The number one major mistake most people make that hurts their blogging career is not having a domain name.

A lot of new bloggers are too reliant on tools like blogger and wordpress.com simply because they want to create new blogs. I have seen a lot of people build a successful free blog and then invest all their marketing efforts into it only for the blog to be deleted because they violated their terms of service.

The biggest mistake you will make as a blogger is using free domain name and hosting services – go professional, spend a few bucks to make sure everything is right and you will be amazed to see what results you can get.
  • Trying to Let Your Blog Center around Yourself Alone

Another major mistake most people make with blogging is letting their blogs center around them alone. They have made their readers love their work so much that it will become difficult for their blog to strive if they aren’t presence.

Just ask yourself. What will happen to your blog if you fall sick or if you have to travel for something more important? A lot of things can happen but you can easily be in control by accepting guest posts or even paying people to write for you. Make sure that your blog isn’t too dependent on you no matter the circumstances.
  • Neglecting to Interact with Readers and Respond to Reader Feedback

The final reason why most bloggers fail is because they put little to no priority on interacting with readers. Some of them even find it very difficult to respond to reader feedback.

Reader interaction is a key to building a successful blog and you will find it easy to succeed if you start paying more attention to your readers. Whenever your readers comment on your blog post make sure you thank them by replying to their comments, whenever they send you an email let them know you care by responding to the email.

How To Create Drop Down Menu For Blogger Using Just Css

0 comments
You Are always try to make your blog Attractive and Imparacive...
Today We learn how to make Drop Down Menu for Blogger To make your blog impresive n attractive....
 This menu uses the more conventional style of a vertical drop down to display links.It has a large bold red on grey color scheme that stands out and looks great.As with the last menu it's built purely from Css using just two images.Below you can see the screenshot and a live demo to see it in action.


Live Demo :-


How To Create Drop Down Menu For Blogger Using Just Css


  • First Go To Blogger Darshboard ----> Design -----> Edit HTML

  • Mark On Expand Widget Tamplets

  • Ctrl + F to find ]]></b:skin>

  • Copy and Paste below Code just above/before ]]></b:skin>


/*Start Css Menu*/
.menu{
border:none;
border:0px;
margin:0px;
padding:0px;
font-family:verdana,geneva,arial,helvetica,sans-serif;
font-size:14px;
font-weight:bold;
color:8e8e8e;
}
.menu ul{
background:url(https://blogger.googleusercontent.com/img/b/R29vZ2xl/AVvXsEgFUlns-JRrvOG1Gbd44-LuoJCOWmsQCbA1RJ87KQg18Eno2EWjkYleakUh5ycNjYZSDh6mwGUGzpWzm_Xo1wb1J40Otwn1lX2aMgy-ecl2PxrR7ayaJ-_BELwsJZC_9MnOVb9CM0S6gx6C/s1600/menu-bg.gif) top left repeat-x;
height:43px;
list-style:none;
margin:0;
padding:0;
}
.menu li{
float:left;
padding:0px 8px 0px 8px;
}
.menu li a{
color:#666666;
display:block;
font-weight:bold;
line-height:43px;
padding:0px 25px;
text-align:center;
text-decoration:none;
}
.menu li a:hover{
color:#000000;
text-decoration:none;
}
.menu li ul{
background:#e0e0e0;
border-left:2px solid #a80329;
border-right:2px solid #a80329;
border-bottom:2px solid #a80329;
display:none;
height:auto;
filter:alpha(opacity=95);
opacity:0.95;
position:absolute;
width:225px;
z-index:200;
/*top:1em;
/*left:0;*/
}
.menu li:hover ul{
display:block;
}
.menu li li {
display:block;
float:none;
padding:0px;
width:225px;
}
.menu li ul a{
display:block;
font-size:12px;
font-style:normal;
padding:0px 10px 0px 15px;
text-align:left;
}
.menu li ul a:hover{
background:#949494;
color:#000000;
opacity:1.0;
filter:alpha(opacity=100);
}
.menu p{
clear:left;
}
.menu #current{
background:url(https://blogger.googleusercontent.com/img/b/R29vZ2xl/AVvXsEgd65ofStF6IgYpOV5cc8DjkTQzrsg5dO2TlP8qOfVZjOFjSe2bgyPE7nC1oMuipfu92HlHvummxPi-s4slNUFnnhrWFH7Yepo18q-QbMWCkqsOzu2xF_TM98oUeIcnDkYwSjOa0W2PqDj1/s1600/current-bg.gif) top left repeat-x;
color:#ffffff;
}

/*End Css Menu from http://www.cutehearthacker.blogspot.com*/

  • Save your Template.

That's the Css added next is to add the html for your menu.

Now go to your blogs Design Page, we will be adding the menu across your blog below the header.This area is called Cross Column and can be seen in the image below.

 
  • Go to Design----> Page Elements---->Add a Gadget

  • Choose HTML/Javascript from the list

  • Now Copy And Paste Below Code in It..

<div class="menu">

<ul>
<li><a href="#" id="current">Home</a></li>
<li><a href="#" >Products</a>
<ul>
<li><a href="#">Drop Down CSS Menus</a></li>
<li><a href="#">Horizontal CSS Menus</a></li>
<li><a href="#">Vertical CSS Menus</a></li>

<li><a href="#">Dreamweaver Menus</a></li>
</ul>
</li>
<li><a href="#">FAQ</a>
<ul>
<li><a href="#">Drop Down CSS Menus</a></li>
<li><a href="#">Horizontal CSS Menus</a></li>

<li><a href="#">Vertical CSS Menus</a></li>
<li><a href="#">Dreamweaver Menus</a></li>
</ul>
</li>
<li><a href="#">Contact</a></li>
</ul>
</div>


  • Now Save HTML/Javascript and You Have done....


How To Add / Submit Google Translator Widget To Blogger

0 comments
Hai Blogger, talking about Blogging tips.. today we'll learn how to add google translator widget to you blogger that allow everyone arround the world understand the content of your blog. it goods for your blog when you want to get much bigger traffic visior arround the world. Anyway, the google translator widget will gonna look like this.
Let you know how to do this thing :

  • Login to Blogger account

  • Click Design / Layout

  • Click Page Eelement

  • Click add A Gatget and Choose HTML/Javascript

  • Now, Copy And Paste below Code Into It.

<script src="http://www.gmodules.com/ig/ifr?url=http://www.google.com/ig/modules/translatemypage.xml&up_source_language=en&w=160&h=60&title=&border=&output=js"></script><noscript><a href="http://www.cutehearthacker.blogspot.com/">Grab This</a><br />

  • Now, Save HTML/Javascript and You Have Done It Chearsssssssssss!!!!!!!!!!

If You Like This Article Then Take a 5 minutes and Share this Article....

Follow Us And Enjoy More Tricks Tips And Tutorials....

How To Change Blogger Background Color & Image | Blogspot | Color Picker | Color Code Generator

0 comments
If you've followed cutehearthacker.blogspot.com from the first time, you might be know that I have changed a few background color of the template a few times. Yes, it because sometimes I feel bored with that. I think if you just bored like me, you no need to create another blog with the same topic, because you can change background color anytime you want. And recently one of a friend of mine asked me how to change background color blogger. So that I make this post, and I hope this will help you out there who has the similar question.

Step 1. Login to Blogger

Step 2. Dashboard > Design > Edit HTML
Step 3. Don't forget to "Backup full template"

Step 4. (Use CTRL + F) and find this code body{
    It will looks like this

body{
background:#FFFFFF; margin:0;
color:#000000;
font: x-small "Trebuchet MS", Trebuchet, Verdana, Sans-serif;
font-size: small; text-align:
center;}


To change background color background:#FFFFFF, you just change the color code. To help you to find and pick up the right color you want,
Just Select Color From below Color code generator..


But if you want to Add Background Image: background: url(LINK);

Repeat the image horizontally (left to right): repeat-x

Repeat the image vertically (top to bottom): repeat-y

No image repeat: no-repeat

Position image to the left or right:
left (for left side)
right (for right side)

Position image to center of screen: center

Fix image on background (to prevent image from moving when scrolling): fixed

Check out the code below as an example:

background: #FFFFFF url(a2.sphotos.ak.fbcdn.net/hphotos-ak-ash4/263943_136752746402556_100002034940997_245578_4260695_n.jpg) repeat-x fixed;

I hope this will help you with your boredness. However, if you still need help or have a question unsolved, please drop them on comment box below, Thank you.

Add The New Facebook Like This Share Icon To Your Blog Posts

0 comments
Facebook have just made a simple Like Button available for bloggers and webmasters.The Like Button or Icon will be a great help in the effort to get readers sharing your posts on Facebook.Social networks and social bookmarking sites are constantly coming up with ways to make it easier for people to share the content they find online with their friends.From Twitter to Digg and Facebook to Stumble Upon there are lots of buttons and icons available on blogs, news sites and other websites allowing you to share their stuff with others.


The new button just made available from Facebook make sharing blogs as easy as possible and this is great news for us bloggers.With the New Facebook Like Button Just one click is required in the very same way as you would click like on a friends picture or comment your own Facebook homepage.Unlike other sharing options you don't get a pop up or have to go to the website you just click like or recommend and your done...Nice Ehh ?

New Facebook Like Button Demo
Best Blogger Tips


How to add the facebook buttons to your Blog


First up i will give you the code for the button and then we will look at were you can add the buttons in your blog posts.


Facebook Like Buttoun Code.

<iframe allowTransparency='true' expr:src='&quot;http://www.facebook.com/plugins/like.php?href=&quot; + data:post.url + &quot;&amp;layout=standard&amp;show_faces=false&amp;width=100&amp;action=like&amp;font=arial&amp;colorscheme=light&quot;' frameborder='0' scrolling='no' style='border:none; overflow:hidden; width:450px; height:40px;'></ifram><a href='http://www.cutehearthacker.blogspot.com'><img alt='Best Blogger Tips' src='https://blogger.googleusercontent.com/img/b/R29vZ2xl/AVvXsEipSKyxHx_uop41WdKah5-EJ0AsrA1fCHDVFj1kgdS0NcISUxDTDh_0I755HRP5aJKMLHORToAc14-qW09ayfXN1HUZtisudL21_62rn4ce48clUxOtKDB1XjV28T5AzszGqmVFMcQjUVqW/s1600/best+blogger+tips.png'/></a>


Were To Place The Button


In this post we will look at three places you can add the button

*Below the post title
*At the top of the post
*Below the entire post

First go to your blogs html by following these three steps
Step-1. In your dashboard click 'Layout'
Step-2. Then Go to 'Edit Html'
Step-3. Tick the 'Expand Widget Templates' box.

To add the button directly below the post titles Find the following code in your blogs Html :

<div class='post-header-line-1'>

Now paste the facebook button code Directly Below / Under <div class='post-header-line-1'>

To add the button at the top of the posts Find the following code in your blogs Html:

<data:post.body/>

Now paste the Facebook button code Directly Before / Above <data:post.body/>

To add the button directly below the posts Find the following code in your blogs Html:

<data:post.body/>

Now paste the Facebook code Directly Below / Under <data:post.body/>

Once you have the Facebook code pasted were you want the button to appear and your template saved go check out your new share option.

More From Facebook - Follow this link to check out our recent post bringing you 8 Great Facebook Icons and widgets for your blog!


This is a great new way to get people sharing your blog and to get more new readers, what do you think ?

If you need any extra help just ask...
 

How to Change Feedburner Email Subject Line

0 comments

FeedBurner is one of the most popular feed management solution that is available today for absolutely free of charge. Many bloggers use FeedBurner to manage their blog’s feed.

I noticed that the email subject line for my blog feed was always “A World Of Possibilities”. This does not give any information about what the email is about and the subscriber has to open the email before he can see the post title. Here’s how to tweak your FeedBurner settings so it will create dynamic Subject lines

Just Following below steps:-

Step 1. Log in to your Feedburner account.

Step 2. Click the name of the feed you want to update.

Step 3. Click the “Publicize” tab.

Step 4. Choose "Email Subscriptions" from the navigation menu

Step 5. That’ll open a sub-menu. Still in the left sidebar, click “Email Branding.

Step 6. Change what you want your subject line to be under the "Email Subject/Title" box.


If you update your blog more than once a day, click the box that says, “Change Subject when an email has 2 or more items” and use following codes:

Examples

  • To replace email subject line with your "last post title"
${lastestitemTitle}

  • To replace email subject line with your "last post title - blog name"
${latestItemTitle} - Your blog name
You can also use
Your Blog Name - “${latestItemTitle}” plus ${m} more
Your Blog Name (in this message: ${n} new items)

${n}: shows the total number of items
${m}: shows the number of items beyond the latest

Flash Animated Label Cloud Widget For Blogger - Blogspot (Updated)

0 comments

Flash Animated Label Cloud Widget(Blogumus) for blogger was awesome widget to show blogger labels in alternatively. This widget is Designed for Word Press, and Now it is available for Blogger.

Now I will Explain How to Use this widget for blogger

Note:- Back Up Your Template before Going to do this for safety

First Customize values bellow and Generate Widget Code


Login to Blogger account
 
Goto Design section > Edit HTML

Search Bellow Tag

<b:section class='sidebar' id='sidebar' preferred='yes'>

 Add Generated Widget Code Just after it

OR

Search Below Code

</b:section>

Add Generated Widget Code before it

Now save your template And check your blog

AWOP Hover Effect Code...

0 comments

Hover Effect !!!!!!!!!!!!!!
its make ur text or image very impressive..
So Today We will know how to do this using CSS ( Cascading Style Sheet )
1. CSS CODE
<style type="text/css">
a:visited  {color:COLOR; text-decoration: none;}
a:link  {color:COLOR; text-decoration: none;}
a:active  {color: COLOR; text-decoration: underline;}
a:hover   {cursor: crosshair; color: BLUE; text-decoration: underline;}
</style>

DEMO OF ABOVE CODE
GO MOUSE POINTER ON WOP N SEE EFFECT


How To Add Floating Share Count button

1 comments

Adding Floating Social Media share Count Button in BLOGGER
it's latest craze to get share your post. do u ever notice that most of blogs using this floating share count button in blogger. Here included Facebook share, Twitter, Linked In, Digg This and Google +1(plus one) button in floating bar.

See the Demo


Step 1: Login To Blogger Account\

Step 2: Go to Design>>Page Elements

Step 3: Add Gadget>> HTML/JavaScript and paste below code..
<!-- floating page sharers Start -->
<style>
#pageshare {position:fixed; bottom:15%; margin-left:-71px; float:left; border-radius:5px;-moz-border-radius:5px;-webkit-border-radius:5px;background-color:#fff;padding:0 0 2px 0;z-index:10;}
#pageshare .Wopbutton {float:left;clear:both;margin:5px 5px 0 5px;}
.fb_share_count_top {width:48px !important;}
.fb_share_count_top, .fb_share_count_inner {-moz-border-radius:3px;-webkit-border-radius:3px;}
.FBConnectButton_Small, .FBConnectButton_RTL_Small {width:49px !important; -moz-border-radius:3px;/*bs-fsmsb*/-webkit-border-radius:3px;}
.FBConnectButton_Small .FBConnectButton_Text {padding:2px 2px 3px !important;-moz-border-radius:3px;-webkit-border-radius:3px;font-size:8px;}
</style>
<div id='pageshare' title="Get this from cutehearthacker.blogspot.in">
<div class='wopbutton' id='fb'>
<a name="fb_share" type="box_count" href="http://www.facebook.com/sharer.php">Share</a><script src="http://static.ak.fbcdn.net/connect.php/js/FB.Share" type="text/javascript"></script>
</div>
<div class='wopbutton' id='rt'>
<script src="http://tweetmeme.com/i/scripts/button.js" type='text/javascript'></script>
</div>
<div class='wopbutton' id='digg' style='margin-left:3px;width:48px'>
<script src='http://widgets.digg.com/buttons.js' type='text/javascript'></script>
<a class="DiggThisButton DiggMedium"></a>
</div>
<div class='wopbutton' id='gplusone'>
<script type="text/javascript" src="http://apis.google.com/js/plusone.js"></script>
<g:plusone size="tall"></g:plusone>
</a></div>
<div style="clear: both;font-size: 9px;text-align:center;"><a href="http://cutehearthacker.blogspot.com/2011/08/how-to-add-floating-share-count-button.html">Get this</a></div>
</div>
<!-- floating page sharers End -->

How To add Linkedin Share Count Button

2 comments


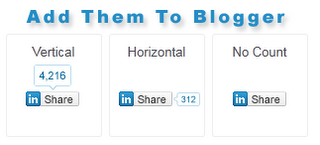
How to add this linked share button in blogger

Step 1: Login To Blogger Account\

Step 2: Go to Design>> Edit HTML
            Check Expand Widget Templates

Step 3: Then Find Following Coding in your template

               <data:post.body/>

Step 4: Then Paste coding provided below just above that line you recently find.
   
Select which type of linked share button add in your blogger.


For Horizontal linkedin share button

<script src="http://platform.linkedin.com/in.js" type="text/javascript"></script> <script type="IN/Share" data-counter="right"></script>


For No Count linkedin share button

<script src="http://platform.linkedin.com/in.js" type="text/javascript"></script> <script type="IN/Share"></script>


For Vertical linkedin share button

<script src="http://platform.linkedin.com/in.js" type="text/javascript"></script> <script type="IN/Share" data-counter="top"></script>

How To Change Text Area Style in Blogger

1 comments

Hey, Blogger User
Are You Boring With old text area???
Now, decorate Text Area with new style using CSS (Cascading Style Sheet)
DEMO FOR TEXTAREA
A World Of Possibilities
My Self Mayur Sojitra known as Heart Hacker. The founder of A World Of Possibilities (WOP). I'm a freelance writer on topics related to Website Optimization (SEO), blogger customizations, making money online, Hacking Tricks, Computer, Facebook, Twitter Tricks, Tips and Tutorial. I'm blogging since 2009 and I'm currently a guest blogger on Blogging With Success.

Follow me on TWITTER

Find Us On FACEBOOK

Join Us On ORKUT


 Thanx For Visit..
Let's Start Tutorial


Step 1: Login To Blogger Account..

Step 2: Go To Design>Edit Html

Step 3: Press Ctrl + F to find this Content </style>
            And then Download this CSS Code and put this Before </style>

CSS


Step 4: You Can use like this in your blogger post
             <div class='wop'>your text here</div>

Note: your text here in this content u can edit your text..

How to Add facebook like button in blogger

0 comments
From lots of request of new bloggers, We are posting new tricks to show Facebook like button for your blog, You can add Facebook like button in your blogger post.You can also install Google +1 button in blogger,and Add Floating Social media sharing buttons in your blog without any coding.You can also add Twitter (Retweet) button in Blogger blog.
However you can  also use Facebook like button, LinkedIn button, Google plus button, twitter button , Digg bookmarking button to boost your traffic.

Thus You blog post will be shared by other people online on internet and they will click like button on your blog, so your blog post link will be posted on their face book wall post and you will get some extra visitor on your blog.
You can get your code for Adding face book like button in blogger at the following URL:
http://www.facebook.com/facebook-widgets/share.php

Add Google +1(Plus one) Button in blogger

2 comments
Google has recently released Google Plus one button, Some people says it Google +1 button, It is almost working like Facebook like button,Both of them are working same as friends are recommending them,  The main difference between Google +1 button and Facebook like button  ,Digg button ,twitter button , LinkedIn button can only below or above post wherever you put it, and Google +1 button is showing in Google Search Result page in Google Search below Result of your blog or website.
You can show Google Plus one button below each post by going to

Blogger dashboard > Design > Page elements >here select the edit button under blog post element,
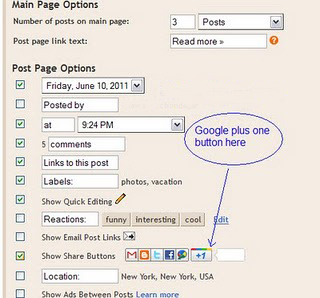
You will be redirected to a page in a new windows, here tick mark the show share button and and save , now refresh your blog post and you will see the change without any coding.

 However if you do not like to put the sharing button below post and you wish to add a floating Google plus one button in your blogger post, you can also add it simply by adding Javascript in to your blogger blog.

GO to your Blogger Dashboard > Design > Edit HTML and backup your blogger template first so that if you do not like the change, you can revert it back by uploading previously back up template.
Search for the following code by pressing CTRL + F.

<data:post.body/> 


Now if you wish to add Google +1 button before starting your content and below post tittle , you can put the following coding before the code, and if you wish to show it below your posted content, you can paste the following coding after that code.

<!-- Google +1 button Start -->
<b:if cond='data:blog.pageType != &quot;static_page&quot;'>
<p></p>
<div style='float:left;padding:10px;'>
<script type="text/javascript" src="http://apis.google.com/js/plusone.js"></script>
<g:plusone expr:href="data:post.url" size="standard" count="true"></g:plusone>
</div>
</b:if>
<!-- Google +1 button End -->
Now Just save the template, You may customize your Google plus 1 button size by following attributes.
small
medium
tall
standard
Here we have given the size standard, you can find it in coding by pressing ctrl + F and search for size="standard"

If you do not wish to appear the count in Google +1 button, you may change the attribute true or false in count attributes.

Create Pure CSS 3D Ribbon

0 comments
Since I always insists using CSS3 instead of images, here is a good example of CSS usage to create a 3D ribbon. Remember this is pure CSS, there is no image used in this to achieve it. I thank James Koster for making this happen and I hope to see even more CSS tuts from him. So lets have a look at his CSS 3D ribbon and how to create it.

James has used a single level element containing a child element with the class.

<p class="ribbon">
   
<strong class="ribbon-content">Everybody loves ribbons</strong>
</p>

 In order to achieve it using CSS, he has used before and after pseudo codes and good use of border properties

.ribbon {
font-size: 16px !important;
/* This ribbon is based on a 16px font side and a 24px vertical rhythm. I've used em's to position each element for scalability. If you want to use a different font size you may have to play with the position of the ribbon elements */

position: relative;
background: #ba89b6;
color: #fff;
text-align: center;
padding: 1em 2em; /* Adjust to suit */
margin: 0 0 3em; /* Based on 24px vertical rhythm. 48px bottom margin - normally 24 but the ribbon 'graphics' take up 24px themselves so we double it. */
}
.ribbon:before, .ribbon:after {
content: "";
position: absolute;
display: block;
bottom: -1em;
border: 1.5em solid #986794;
z-index: -1;
}
.ribbon:before {
left: -2em;
border-right-width: 1.5em;
border-left-color: transparent;
}
.ribbon:after {
right: -2em;
border-left-width: 1.5em;
border-right-color: transparent;
}
.ribbon .ribbon-content:before, .ribbon .ribbon-content:after {
content: "";
position: absolute;
display: block;
border-style: solid;
border-color: #804f7c transparent transparent transparent;
bottom: -1em;
}
.ribbon .ribbon-content:before {
left: 0;
border-width: 1em 0 0 1em;
}
.ribbon .ribbon-content:after {
right: 0;
border-width: 1em 1em 0 0;
}


If your using the ribbon inside another element, add this CSS

position: relative;
z-index: 1;

How To Add Perfect Share Box to Blogger

0 comments
In this tutorial, I am going to show how to add a useful share box for your blogger blog. This share box contains official Tweet button with counter, official Facebook share button with counter, official Google Buzz button with counter, official Stumbleupon button with counter, BlogThis! link, Email This! link, Print This! link, Comments count link and Facebook like button. I have configure all this button for Blogger blogs, so you can add this share box quickly to your blog.

Now follow the steps given below to add this share box for your blog.

1.Login to your blogger Dashboard and go to --> Design- -> Edit HTML

2.Click on "Expand Widget Templates"

3.Scroll down to where you see below code:

<div class='post-header-line-1'/>

4.Now Copy Share Box code given below and paste it just below the above code.

NOTE: If you can't find <div class='post-header-line-1'/> in your template, paste your "Twitter tweet button" code just before <data:post.body/> .

<b:if cond='data:blog.pageType == &quot;item&quot;'>

<style type='text/css'>
.multisharebox {
background: none repeat scroll 0 0 #EFEFEF;
float: right;
margin: 5px 0px 3px 10px;
padding: 0 5px 0;
text-shadow: 0 1px 0 #FFFFFF;
width: 260px;
border:4px solid #d8dfea;
}
.fb-like-boxtop {
background: none repeat scroll 0 0 #EDEFF4;
border: 1px solid #D8DFEA;
color: #000000;
float: right;
font-size: 11px;
margin: 0 0;
padding: 5px 10px;
text-align: left;
width: 230px;
}
.fb-like-boxtop a {
color: #000000;
text-decoration:none;
}
.fb-like-boxtop a:hover {
color: #000000;
text-decoration:underline;
}
.fb-like-box {
background: none repeat scroll 0 0 #EDEFF4;
border: 1px solid #D8DFEA;
color: #000000;
float: right;
font-size: 11px;
height: 60px;
margin: 5px 0;
overflow: hidden;
padding: 5px 10px;
text-align: left;
width: 230px;
}
</style>

<!-- Perfect Share Box : Created by www.bloggertipandtrick.net -->
<div class='multisharebox'>
<table><tr>
<td><table><tr>
<td><a class='twitter-share-button' data-count='vertical' data-lang='en' data-related='' data-via='' expr:data-text='data:post.title' expr:data-url='data:post.url' href='http://twitter.com/share' rel='nofollow'/>
<b:if cond='data:post.isFirstPost'>
<script src='http://platform.twitter.com/widgets.js' type='text/javascript'>
</script>
</b:if></td>
<td><script expr:src='&quot;http://www.stumbleupon.com/hostedbadge.php?s=5&amp;r=&quot; + data:post.url'/></td>
<td><a class='google-buzz-button' data-button-style='normal-count' data-locale='en_IN' expr:data-url='data:post.url' href='http://www.google.com/buzz/post' rel='nofollow' title='Post on Google Buzz'/>
<script src='http://www.google.com/buzz/api/button.js' type='text/javascript'/></td>
<td><a expr:share_url='data:post.url' name='fb_share' rel='nofollow' type='box_count'/>
<script src='http://static.ak.fbcdn.net/connect.php/js/FB.Share' type='text/javascript'/></td>
</tr></table></td>
</tr><tr>
<td><div class='fb-like-boxtop'><a expr:href='data:post.sharePostUrl + &quot;&amp;target=blog&quot;' expr:onclick='&quot;window.open(this.href, \&quot;_blank\&quot;, \&quot;height=270,width=475\&quot;); return false;&quot;' expr:title='data:top.blogThisMsg' target='_blank'>BlogThis!</a> | <a expr:href='data:post.sharePostUrl + &quot;&amp;target=email&quot;' expr:title='data:top.emailThisMsg' target='_blank'>Email This!</a> | <a href='javascript:window.print();'>Print This!</a> | <b:if cond='data:post.allowComments'><a expr:href='data:post.addCommentUrl' expr:onclick='data:post.addCommentOnclick'><b:if cond='data:post.numComments == 0'>No comments</b:if><b:if cond='data:post.numComments == 1'>1 comment</b:if><b:if cond='data:post.numComments &gt;= 2'><data:post.numComments/> comments</b:if></a></b:if></div></td>
</tr><tr>
<td><div class='fb-like-box'>
Do you like this post?
<iframe allowTransparency='true' expr:src='&quot;http://www.facebook.com/plugins/like.php?href=&quot; + data:post.url + &quot;&amp;layout=standard&amp;show_faces=false&amp;width=230&amp;action=like&amp;font=arial&amp;colorscheme=light&quot;' frameborder='0' scrolling='no' style='border:none; overflow:hidden; width:230px; height:40px;'/>
</div></td>
</tr></table>
</div>
<!-- Perfect Share Box : Created by www.bloggertipandtrick.net -->

</b:if>

Note : This share box now will add to your Blogger post pages only. If you want to show it in every pages, then simply remove green lines from the code.

5. Save your template and you are done.
 

Google+ Followers

Total Pageviews

FeedBurner

Mayur Sojitra - Find me on Bloggers.com
Follow on Bloglovin
© 2012 A World Of Possibilities . Designed by Nitin Maheta, Powered by Blogger